Real World delivers commercial anti-spam services for a range of e-mail hosting products, including Microsoft Exchange, through it's SpamCloud product.
SpamCloud is a hosted mail filtering service that sits in between your mail server and the internet, marking SPAM e-mail and blocking Virus' and Malware. E-mail that we think is SPAM is delivered to your mailbox and automatically placed in your Junk Mail folder so that you can review it and find important e-mails.
Once Real World has confirmed your domain has been set up, you need to make some changes to ensure that SpamCloud is protecting your email.
Configuring your MX records
If you are an IT administrator using SpamCloud there are few settings you need to implement. To begin with, you need to configure your MX records as follows:
| MX Priority | Server Name |
| 10 | spamcloud01.thecore.net.au |
| 10 | spamcloud02.thecore.net.au |
| 25 | spamcloud03.thecore.net.au |
If you are using Real World's Name Server system it will look like this:

As with any DNS changes, we recommend you make the changes during a non-busy time. For most businesses this means a great time to make them is Friday night to ensure that you have the weekend for these addresses to be updated.
You can use a service from a site like mxtoolbox.com to see what your NS records are set to.
Configuring Exchange to understand SPAM e-mail
SpamCloud is integrated into Microsoft Exchange using Transport Rules to set the Spam Confidence Level (SCL) based on information added to the e-mail message by SpamCloud.
The following settings have been tested for Exchange 2007, 2010 and 2013. If you are running Exchange 2007 you may need to perform further configuration to fully support the Exchange Spam Confidence Level (or SCL) settings and ensure appropriate message handling. If you run into any issues you can contact our helpdesk. While we have only provided screen shots for Exchange 2013 at this time it should be relatively simple to use these instructions as a basis for earlier versions of Exchange.
Step 1. Log into your Exchange Admin panel at https://<your exchange server>/ecp
Step 2. Select the "mail flow" menu item from the EAC navigation bar.
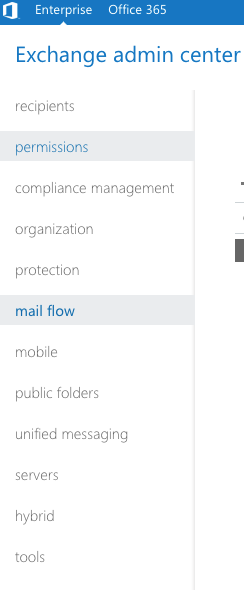
Step 3. Add a rule for the Spam Confidence Level by clicking the + button in the toolbar

Step 4. Choose the "More options…" link near the bottom of the screen that pops up and enter the name for the first rule as "SpamCloud SCL1"

Step 5. Select "A message header" -> "Matches these patterns" from the "Apply this rule if…" drop down.
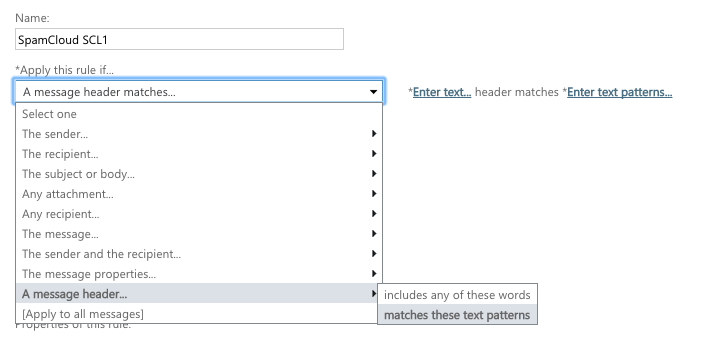
Step 6. Click on the "Enter Text…" beside "header matches" and set the header value to X-Spam-Level.
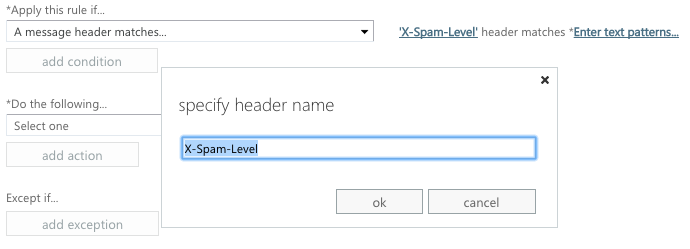
Step 7. Click on "Enter text patterns…" and enter the pattern "^\*" (carrot backslash asterisk) and click the "+" button to add it to the list.

Step 8. Under "Do the following" select "Modify the message properties…" -> "Set the spam confidence level (SCL)" and then select a value of 1.
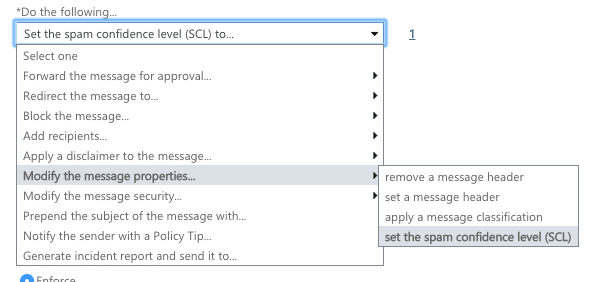
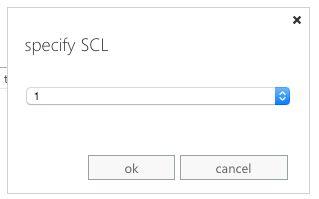
Step 9. Save the rule. This will add it to your transport rule list.
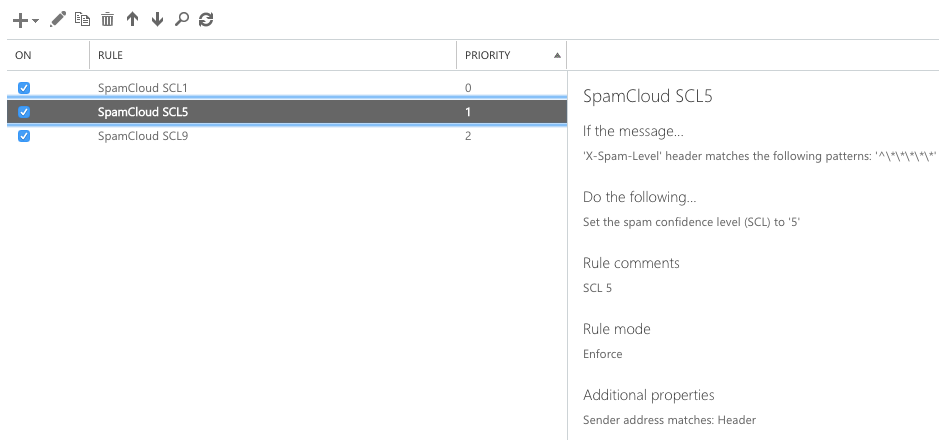
Step 10. Repeat the process with each of the following settings:
| Rule Name | Pattern to Match | Spam Confidence Level | Priority |
| SpamCloud SCL1 | ^\* | 1 | 0 |
| SpamCloud SCL5 | ^\*\*\*\*\* | 5 | 1 |
| SpamCloud SCL9 |
\*\*\*\*\*\*\*\*\* |
9 | 2 |
When you've finished your screen should look like this.
Testing your SPAM service
You should very quickly start to see messages being delivered to your Junk e-mail box. Some messages will be marked with the phrase "SPAM >" in the subject if they have received a very high SPAM level indicator from SpamCloud.
You can use an external services such as E-mail Security Check to help you make sure it's working correctly. If your SpamCloud settings are configured correctly you should receive the test message 3 of 7 in your junk mail box. The other 6 messages will be blocked by SpamCloud's virus and Malware filter.
Securing your mail server
Once you have been using SpamCloud for a little while you may notice that e-mail is not being classified as SPAM. This is usually caused by mail being delivered directly to your exchange server and bypassing the SpamCloud mail filter. To combat this you can modify your internet receive connector to only accept mail from the SpamCloud IP ranges. At the time of writing you should allow:
- 114.141.101.136/29
- 103.16.96.136/29
- 103.16.98.136/29
We do not provide instructions on how to do this as there can be quite a substantial variance in customer Exchange receive connector settings, however if you run into difficult, customers with support agreements are welcome to contact the Real World helpdesk for assistance with configuration.

Comments
0 comments
Please sign in to leave a comment.