About Schedules
- Go to PBX Settings -> Schedules

- This will give a list of all the schedules

- You can edit a schedule by clicking on the schedule name.
- The schedules work from top to bottom, so any 'catch-all' all-hours schedule should be on the bottom, and any public holidays/special closures should be listed above the standard all-hours schedule
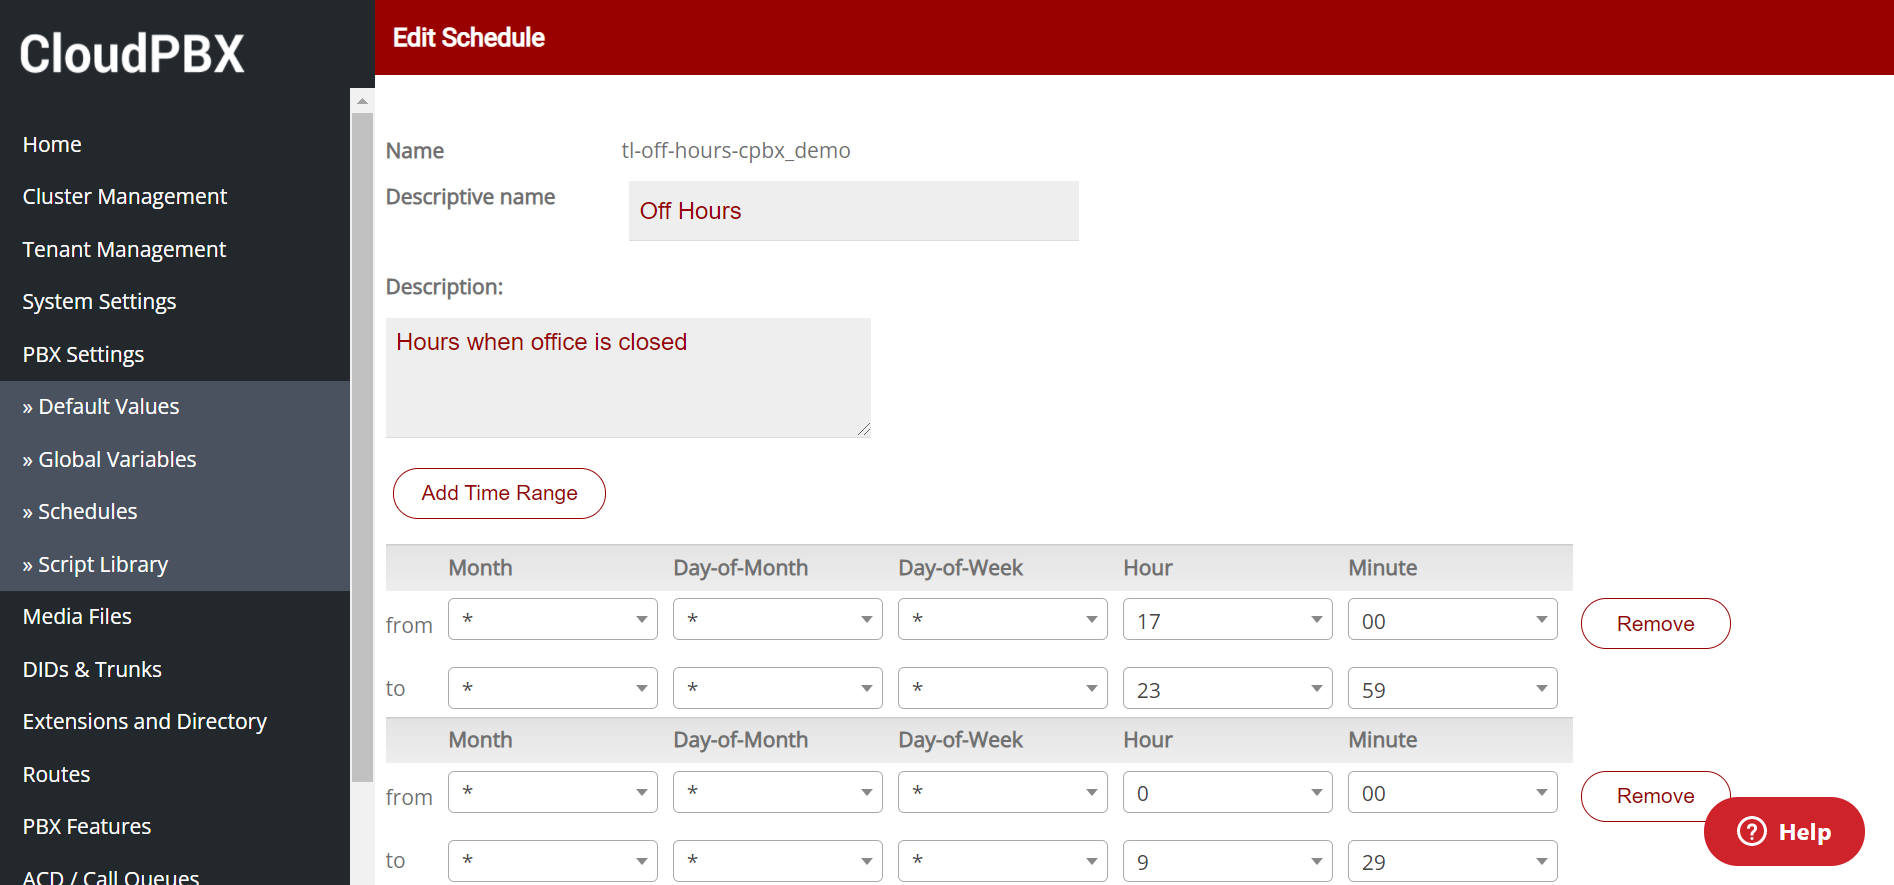
- Schedules only work from the day to midnight
- eg: you’ll need a schedule from 19:00 – 23:59, and then a schedule from 00:00 – 06:00
- You cannot make a schedule that varies the time and day simultaneously. Doing this will trigger a glitch in the software, and it might not work properly. The schedule must either run across multiple days with no time variation, or over one day with a time variation
Example of what will work:

Example of what will not work:

- While you can also set schedules to specific days of the year (eg March 7 Mon 9:00), it is not recommended, as it can potentially cause issues with the system if it is still active and not removed by the next year.
How to make a new schedule
- To make a new schedule, on PBX Settings -> Schedules, click the ‘Create Schedule’ button

- Type in the name of the schedule in ‘Name’ and a description in ‘Descriptive name’
- Hit the ‘Add Time Range’ button
- Put in the time range necessary
- Hit ‘Create’


Comments
0 comments
Article is closed for comments.